Disclaimer- Working with sea shell dust of any kind is very dangerous, not only breathing it in, but also via the heavy metals some shell dust contains and skin contact. Please use protective masks and wind displacement to limit your contact with shell dust. Breathing it in can be deadly, and it doesn’t take much to harm you. Keeping eye & skin protection on (goggles & gloves) while creating dust is highly important for your health as well. Please research the dangers before proceeding with working with shells of any kind.
Below is a great article about the dangers that you should read.
Conch Shell Trumpets
Over the years I have worked with many types of artistic media, but natural materials are one of my favorites. Creating conch shell trumpets is a passion of mine that integrates many different types of natural materials to create a working musical instrument or ceremonial tool. The use of the shell, harvest hole filing materials such as mica or other stones, wood for the mouthpiece and other various materials apex with the final working trumpet.
In my Taino tradition the conch shell trumpet is called a Guamo by the ancestors, and is used to open ceremonies at the very least. I have a great article discussing the various manifestations of conch shell trumpets created and used around the world by various cultures. Check out the linked past article above to learn about the cultural and historical aspects of conch shell trumpets from around the world.
Parts of a Shell
First off, we need to review the different parts of a shell, so when I refer to a part you know what we are talking about. Below is a diagram showing the various parts of a shell, this shell is very similar to the shapes you will find of conchs.
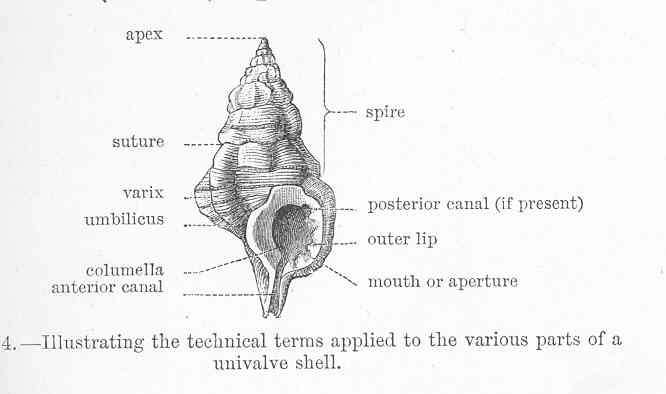
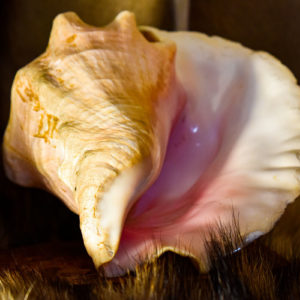
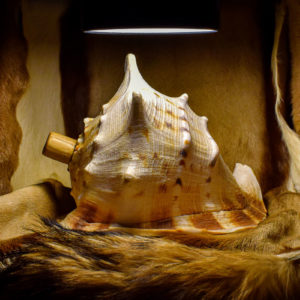
The apex is where you will be cutting a mouthpiece opening. This is usually about 3-4 sutures down the spire from the apex. Sometimes your shell may contain holes in the spire where the conch was harvested from the shell. Those will need to be filled with something for your trumpet to work. So, the important parts are the apex, spire, and mouth; which you will find referenced in the article below. If you look at this next set of images, you will find this type of conch has a flat spire, but the parts are sill the same.


Find Your Shell
The first step in making a conch trumpet is finding a conch of appropriate size and that you would like to use. You can find these on sites such as ebay or etsy, with prices ranging from $10 or more than $100. I suggest going to your local flea market or Habitat for Humanity and you may be able to find one for less than $5, you just need to keep your eyes open.


After finding the perfect conch now you must assess the conch for a harvest hole or damage. Many times you can find conchs with the mouthpiece opening ready for playing as a trumpet right when you buy them. Though other times you will need to patch the harvest hole and cut your own mouthpiece opening. I like to add wooden mouthpieces to the playing hole for easier playing and it looks great too, but they are optional.
Creating the Mouthpiece Opening
Once you find your shell, the next step I complete is creating the mouthpiece opening, if not cut already. You will need to go at least 3-4 rotations from the apex, but a decent 1/2″ hole is needed to play, so you could base your measurement off of that size as well. As you can see by the pictures above, I started cutting about 4 sutures from the apex of the shell. I usually use a hack saw with metal blade for this process, and a mask is required. I use a hack saw because using an electric tool (like a saw) can create more dust, which is very hazardous to breathe in.


Please try to cut this outside and preferably with a fan blowing the dust away from you. Sometimes another alternative would be to spray some water on the area your cutting to reduce the dust and make it too heavy to get airborne. This is very important since shell dust is very dangerous, as I stated in the beginning of this article.
Prepping the Mouthpiece
Now that you have an actual mouthpiece opening you will need to prep the area so it’s playable. This requires using a tool like a screw driver and breaking some of the spiral material inside the open section of the spire, where the apex was before we removed it. You only want to remove the cut pieces of the inside of the spire, do not destroy the closed area within that’s not affected by the cutting we completed earlier. Once you look inside you will understand this part of the directions much better.


After removing the cut areas of the spire interior, then you must level the opening hole, this helps with playing or with adding a wood mouthpiece, if you choose. At this point if you have no harvest holes further down the spire, then you should have a working trumpet, give it a try.


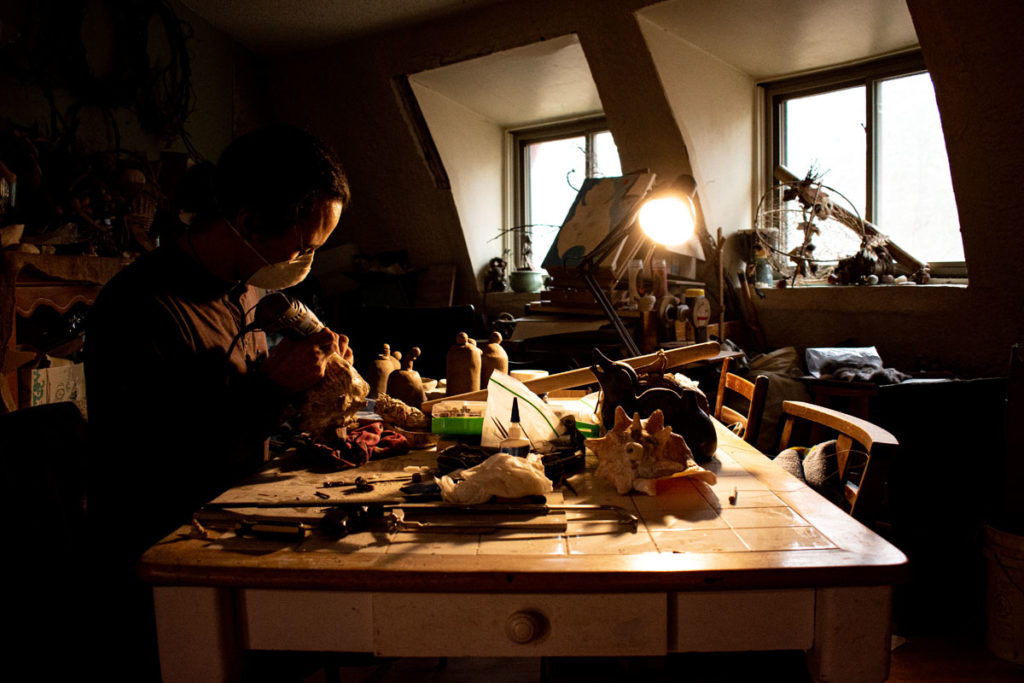
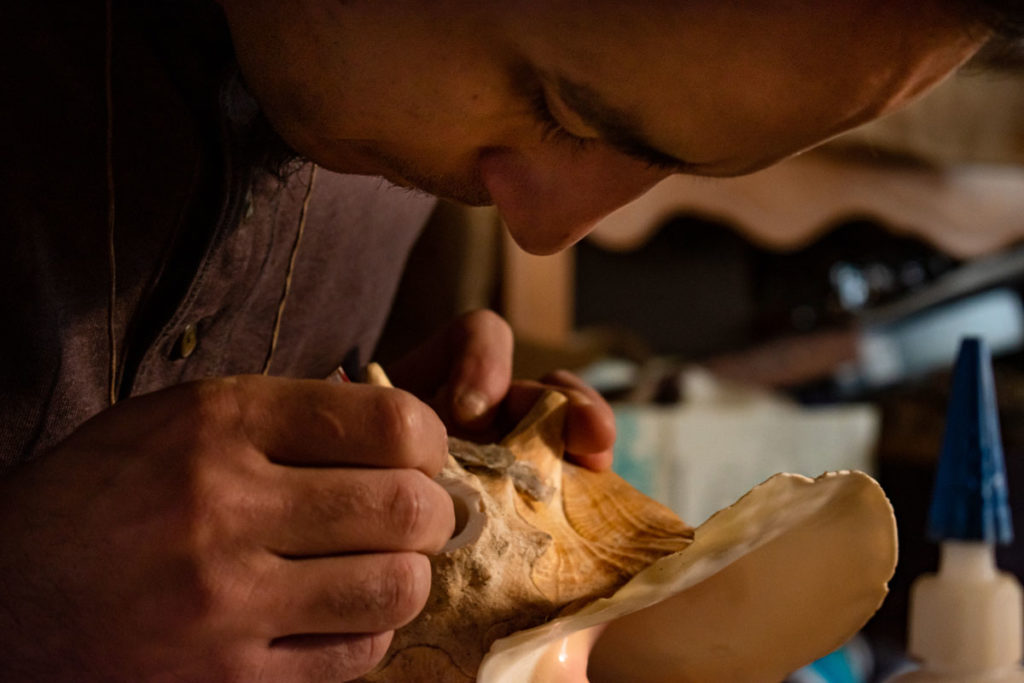
While working this particular piece I broke a small section of the interior that I wasn’t intending to, this meant more work for me patching the hole inside the mouthpiece. The picture below shows me working to use sheets of locally harvested mica and super glue to patch the interior hole. This is the same material I prefer to use to patch the outside harvest hole as well, which you can see in some of the images. Once I am satisfied with my interior repair I move on to the next step.
Patching the Harvest Hole
Without these patches for the holes in the spire, the trumpet cannot play, so this step is vital. I prefer to use locally harvested mica for patching the harvest hole. Using sheets of mica is useful in many ways for this process, and is a method I came up with specifically for this purpose.
Mica has the ability to bend when separated into thin sheets, which is helpful in matching the shape of the shell. It is flat and can be broken in sheets, which gives you large areas of coverage with a thin strong sheet. Using super glue makes the mica very hard and almost the same density as the shell. I just layer sheets of mica and glue, until I have a strong bond and patch. Once dry I sand down and polish, the mica creates a beautiful look to the patch, and it’s usually hard to notice.


Sometimes I also use beads, stones, wood, and other things to patch the holes. You can use anything that is fairly hard and that fits in the harvest hole. Above I used a bead to cover a small round hole this shell came with. You can also get a good view of the harvest hole patch on the images above from a past commission. Like I stated above, using a flexible material like mica is much easier than custom carving wood or other materials to cover the harvest hole, with it’s curves and irregularities it can be a pain to match the shape.


Using a rotary tool I sand away the loose mica/glue patch once dry. My process for this is to match the shape of the shell and what I envision the shell looked like before being harvested. I then use various sandpaper grits slowly polishing the area, trying to retain as much shell as possible. This process eventually ends with a nice patch to make a functional trumpet.
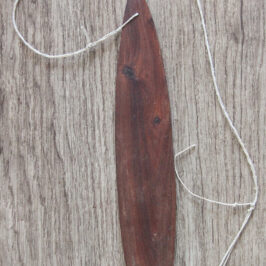
Making a Wood Mouthpiece


Mouthpieces can come in all shapes and opening dimensions, and are optional. So, you don’t need a wood mouthpiece, but it really makes it easier to play the trumpets. Some people prefer larger openings, and some prefer smaller, that is up to you. Within the previous examples you will find a number of various designs for wood mouthpieces. The mouthpiece in this project ended up being longer for easier access (the shell lip extends close to the apex opening, so I made a long wood extension type mouthpiece similar to a Māori trumpet) which has an interior design similar to a contemporary trumpet mouthpiece.
I find a proper piece of wood that fits the apex opening and then custom make each mouthpiece. Cutting and carving each to shape, sanding, and attaching to the shell. I use super glue to attached this to the shell, for a long lasting and strong bond. If there are any small gaps in the connection of the wood and shell, I pack the gaps with stone or shell dust and glue into place. Once that’s done I sand and condition with cutting board conditioner (made of mineral oil and beeswax).


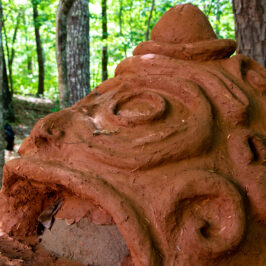
Custom Carving
Sometimes I carve the outside shell with designs, this is a very artistic part of the build. The pictures below show some of that process on my personal ceremonial conch shell trumpet (Guamo). It is based on an ancient Mayan trumpet artifact. I use water or oil to minimize airborne dust when doing this inside, during warmer months my preference is doing most of this outside.
Many times in the warm season here in the Southern Appalachian mountains you will find large areas of stone or shell dust in my yard, vague references to some type of artwork being manifested under the blue sky.
William A. Rodriguez- Archaic Roots


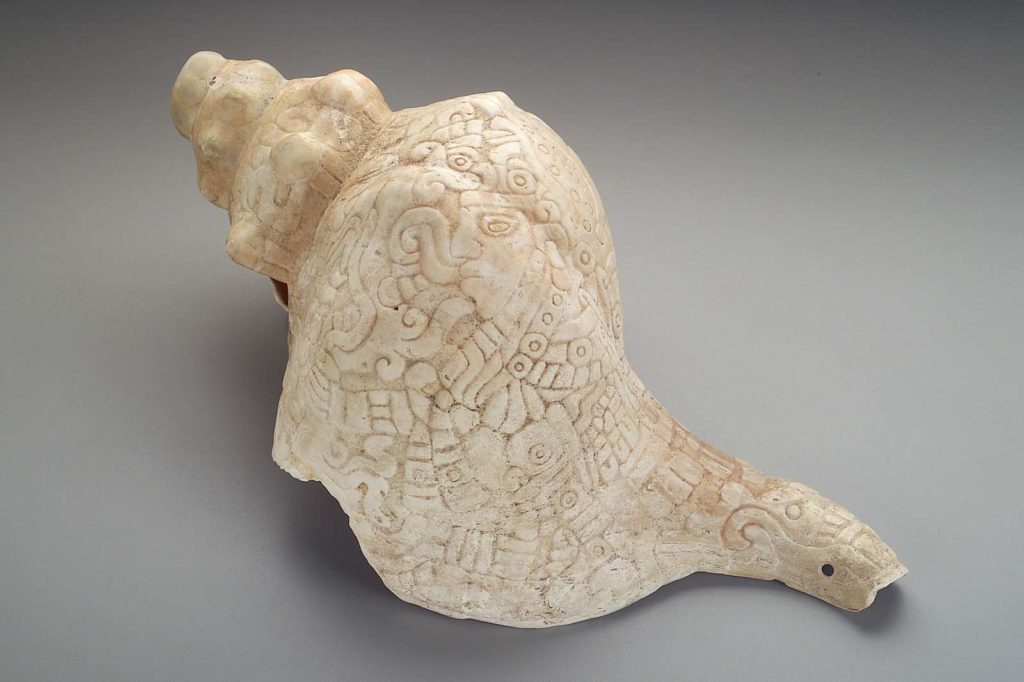
Conch shell trumpet
Aztec or Mixtec
Late Postclassic period
A.D. 1425–1520
Object Place: Mexico, Central or Southern Highlands
Dimensions
38.1 x 20 cm (15 x 7 7/8 in.)
https://www.mfa.org/collections/object/conch-shell-trumpet-36241
Conclusion
As you’ve learned in this article, making a conch shell trumpet isn’t hard, and there are various options you can add such as wood mouthpieces and carvings. You can also add other things like rope straps (as you can see on the artifact above, there is a small hole for a rope decoration or strap of some type on the lower lip). Below are a few other examples of artifacts of conch shell trumpets for inspiration on your next project!
Hope you enjoyed this article, and I hope this inspires you to make your own trumpet! When you do, please reach out and show me your finished piece or comment on the article!!! Thanks for reading and go make something!!!
I would like to thanks Jaron Loggins for the awesome photography for this article! If you’re in North Georgia and looking for a great photographer, look him up!


If you would like a custom shell trumpet created by us feel free to reach out to us at 404-456-9932 or info@archaicroots.com.
Check out our available trumpets below.
Available Shell Trumpets
-
 Medium Conch Shell Trumpet$120.00
 -
 Large conch shell trumpet$160.00